If you’re still printing documents, signing them, and scanning them back, you’re probably wasting more time than you think. Most businesses have already moved away from that. These days, people just sign PDFs directly-it’s quicker and a lot less hassle.
Whether it’s invoices, agreements, or compliance-related documents, digital signatures are now part of regular day-to-day work.
In this guide, we’ll show you exactly how to add a digital signature to a PDF, step by step. We’ll also break down when it makes sense to use a DSC token and when a PFX file is enough, so you can pick what actually works for you.
What is a Digital Signature in a PDF?
A digital signature isn’t just a scanned sign or an image pasted onto a document. It basically adds a secure layer to your PDF that shows who signed it and makes sure nothing has been changed after that.
In Simple terms, A digital signature does two things:
- It shows who signed the document
- It locks the file so nothing can be changed afterward
Once a PDF is signed, even a small edit will break the signature. That’s how you know right away if anything has been altered.
That’s exactly why digital signatures have become a trusted standard for businesses. You’ll find digital signatures being used in all the usual day-to-day work, like:
- Invoices, reports, and other financial documents
- Contracts and legal agreements
- Government filings and tender submissions
- Internal approvals and regular business paperwork
In short, anywhere you need trust and clarity on who signed what, digital signatures come into play.
When speed and security both matter, digital signatures just make things easier- they’re far more reliable than the old way of printing, signing, and scanning documents.
What is a DSC Token and PFX File?
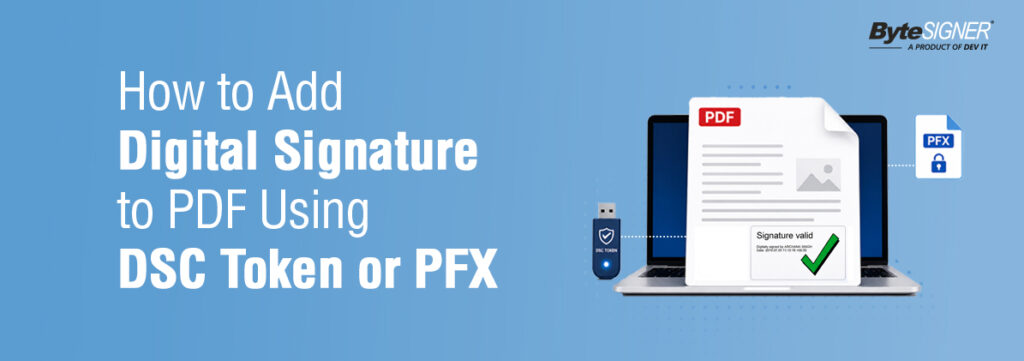
To sign PDF document digitally, you’ll typically use either a DSC token or a PFX file. Both serve the same purpose- but are used differently.
DSC Token (USB Token)
A DSC token is basically a small USB device that holds your digital signature certificate. Instead of keeping it on your system, the certificate stays inside the token itself-which already makes it a safer option to work with.
In day-to-day use, it’s straightforward:
- You need a PIN to access it, so only the authorized person can sign
- It’s commonly used for GST filings, MCA work, and e-tender submissions
- It’s usually preferred in cases where compliance and security can’t be compromised
Since the certificate never leaves the device, it naturally adds an extra layer of protection. That’s exactly why DSC tokens are usually picked for sensitive or legally binding work-where security isn’t something you want to take chances with.
PFX File (Software-Based Certificate)
A PFX file is your digital signature saved directly on your computer.
You don’t need a USB device- just load the file and sign. You don’t need to rely on any external device every time you want to sign a document, which makes things a lot more straightforward in day-to-day work.
When a DSC Token makes sense
- GST filings, MCA work, or e-tenders
- When rules are strict and you can’t take chances
- When only certain people should be signing
- Documents that might be checked later in audits
Basically, if the document has legal importance or could come under review later, it’s better to go with a DSC token.
When a PFX file works better
A PFX file is more for day-to-day office work where things need to move quickly.
- Internal approvals, reports, routine files
- When you must sign a lot of PDFs together
- When timelines are tight
- Work that keeps moving between teams
If you’re dealing with a lot of documents every day, a PFX file just makes the process faster and easier without adding extra steps. If your work involves handling a high volume of documents and you need to move quickly, it fits in much more naturally with your workflow.
DSC Token vs PFX – Which One Should You Use?
Think about it this way. You would not use the same process to file your taxes as you would to approve an internal report. The stakes are different, the rules are different, and the consequences of getting it wrong are very different. The same logic applies to digital signatures. A DSC token and a PFX file are both valid options, but knowing which one fits your situation is what keeps your documents compliant, your workflows smooth, and your team out of trouble.
The Real Difference Between DSC Token and PFX File:
When to Use a DSC Token | When PFX File Works Better |
The DSC Token is usually used when a document needs to be | On the hand the PFX File is usually used for everyday |
The DSC Token is commonly used for things like GST filings | In contrast the PFX File is commonly used for approvals, |
I think the DSC Token is an option when there are strict | The PFX File is an option when teams need to sign and |
The DSC Token allows only authorized individuals to sign | This makes the PFX File a better choice when you need to |
People often prefer the DSC Token for documents that may | The PFX File works well when documents are regularly |
Using the DSC Token gives added confidence when a document | The PFX File helps keep day-, to-day document processes |
So the DSC Token is best when compliance and document | The PFX File is best when speed and ease of use are |
How to Add a Digital Signature to a PDF
The process itself is not complicated. Once you’ve done it a couple of times, it becomes routine
Method 1: Using a DSC Token
Step 1: Connect the DSC token
Plug in the DSC token and ensure your system detects it properly.
Step 2: Open your PDF signing software.
Use tools like ByteSIGNER that support DSC signing.
Step 3: Select the Source Folder
Choose the folder that contains the PDF files you want to sign using the DSC token.
Step 4: Upload the PDF
Please select the document you need to sign.
Step 5: Select the certificate
It will be picked from the token.
Step 6: Enter your PIN
This is where access is verified.
Step 7: Choose Where to Sign
Select the page or pages where you want to add the digital signature.
Step 8: Place the signature
Choose the exact spot on the document.
Step 9: Save the file
Once done, the document is ready.
This approach is typically used when the document needs to be accepted without any doubts or rework later.
Method 2: Using a PFX File
Step 1: Open your tool
Launch the software you usually work with for signing PDFs.
Step 2: Select the Source Folder
Choose the folder containing the PDF files for PFX signing.
Step 3: Upload the document
Choose the file that needs to be signed.
Step 4: Load the PFX file
Select the certificate file from your system storage.
Step 5: Enter the password
Enter the password to unlock the certificate for signing.
Step 6: Select Page(s) for Signing
Choose the page or multiple pages where you want to apply the digital signature.
Step 7: Place the Signature
Set the signature position on the document.
Step 8: Save the document
Save the digitally signed PDF file.
This method is ideal when you need to digitally sign multiple PDF files quickly without repeating the same steps again and again.
How ByteSIGNER Simplifies DSC and PFX-Based Signing
Once your document volume increases, the challenge is no longer “how to sign”- it becomes “how to manage signing efficiently.
This is where a tool like ByteSIGNER naturally fits into the workflow.
- Add digital signature to PDF using both DSC tokens and PFX files from a single interface
- Bulk signing lets you handle multiple documents in minutes
- Works offline, so sensitive files stay within your system
- Simple, user-friendly interface reduces dependency on technical expertise
- Maintains consistency, even when multiple team members are involved
For businesses that deal with invoices, compliance documents, or contracts every day, this approach cuts down a significant amount of manual effort-without forcing you to change your existing process.
Common Mistakes to Avoid While Using DSC and PFX
- DSC token not detected
Usually a driver issue. If your system doesn’t recognize the token, check installation or try restarting once before you begin. - Wrong PIN entered multiple times
Entering the wrong PIN again and again can lock the token. Make sure only the authorized person is using it. - Expired certificate
If your DSC or PFX has expired, the signature won’t be valid. Always check validity before signing important documents. - Incorrect signature placement
Signing in the wrong place can lead to rejection, especially in government or compliance documents. Always place it where required. - Sharing PFX password
Keeping the PFX password open or shared can create security risks. Treat it like any sensitive login detail. - Skipping final check
After signing, take a few seconds to open the file and confirm everything looks correct. It saves unnecessary back-and-forth later.
Best Practices for Using DSC and PFX Effectively
If you deal with digital signatures often, a few simple habits can save a lot of time and avoid unnecessary headaches later.
- Keep things clear from the start
Use DSC tokens only where they’re actually needed-like GST, MCA, or any compliance work. For day-to-day internal files, PFX is usually faster and easier to manage. - Don’t share access casually
It’s tempting to pass things around when work is urgent, but that’s where problems start. Keep DSC with the right person, and don’t leave PFX files or passwords open. - Stick to one way of working
If everyone in the team follows the same process-same signature spot, same file naming-it avoids a lot of confusion later. Especially when multiple people are involved. - Avoid signing one by one
When documents start piling up, doing it manually slows everything down. Bulk signing just makes life easier and cuts down small mistakes. - Keep your files in order
It might not feel important right now, but it helps later. When someone asks for a document after weeks or months, you’ll know exactly where to find it.
In the end, it’s not about doing anything complex. Just keep the process simple and consistent, and things run much more smoothly.
Why Many Businesses Have Started Using Digital Signatures for PDFs
In many companies, document signing is still handled manually. Someone downloads the PDF, takes a printout, signs it, scans it again, and sends it back on email. When there are only a few documents, the process feels manageable. But as the work increases, it starts taking more time than expected.
This usually happens in accounts departments, HR teams, legal teams, and vendor approval processes where documents are exchanged between multiple people in a single day.
For accounts teams especially, this becomes part of the regular routine. Invoices, payment approvals, purchase documents, and other financial files keep moving from one person to another throughout the day. When every PDF needs to be downloaded, signed manually, scanned again, and shared back, the process slowly starts consuming a lot of working time. The same thing happens in HR and admin departments too, where employee forms, agreements, and internal approval documents are shared between multiple teams on a daily basis.
Because of this, many businesses now prefer using tools like ByteSIGNER for signing PDF documents as part of their regular workflow. Teams can sign files using DSC USB tokens or PFX certificates and also handle multiple PDF documents together when the workload is higher.
Another reason many businesses prefer this approach is that documents remain within their own system instead of being uploaded to different online platforms.
For many businesses, uploading important documents to online platforms doesn’t always feel comfortable, especially when those files contain financial records or other sensitive company information. Keeping everything within the company’s own setup feels simpler for teams to manage during daily work.
Since most office work is already handled digitally these days, signing PDF documents is gradually becoming a regular part of daily work for many teams rather than a separate process.
Final Thoughts
Digital signatures are no longer something “extra” in business workflows—they’re part of the routine now. From approvals to compliance paperwork, most processes depend on them in some form.
What really makes a difference is knowing when to use what. A DSC token is the better choice when strict rules and verification matter, while a PFX file works well when you need speed and have a high volume of documents to handle. Once that clarity is in place, the whole signing process becomes smoother, faster, and far less stressful to manage.
The simple rule most teams follow is this:
Use a DSC token when compliance is non-negotiable. Use a PFX file when speed is the priority.
Once that balance is clear, managing documents becomes much easier for teams and doesn’t take up unnecessary time or effort. In many organizations, document approvals still get delayed because files are scattered across emails, shared folders, and multiple follow-ups. When the number of documents starts growing, it’s easy to lose track of what’s pending, what’s approved, and what still needs attention.
ByteSIGNER brings everything together in one place-approvals, signatures, and tracking- so teams don’t have to manage it across different emails or tools. It keeps the process simple and helps work move without unnecessary delays.